This post can now be found HERE.

Showing posts with label Off-Season. Show all posts
Showing posts with label Off-Season. Show all posts
Saturday, December 10, 2011


Thursday, December 8, 2011
Thursday, December 1, 2011
Monday, November 28, 2011
Sunday, November 27, 2011
Saturday, November 26, 2011
Wednesday, November 23, 2011
Tuesday, November 22, 2011
Friday, November 4, 2011
Thursday, November 3, 2011
Thursday, September 1, 2011
Tuesday, August 30, 2011
Friday, March 11, 2011
Indoor Hitting Drills
Yesterday's post dealt with some indoor practice tips. Below are some drills specific for those hitting stations that allow you to maximize the time and space available. Of course, these tips and drills are also great for individual players who are looking for ways to improve their hitting when they are stuck indoors at home.
Hitting drills for station work:
Hitting drills for station work:
No stride drills – I’m a big fan of these drills because they stress to players that you don’t need a big stride to hit. Live hitting, short toss, soft-toss, and tee work are all options for no-stride stations.
High pitch Tee – set the tee to the highest position to work on the highest pitch a batter can hit. Placing the tee on a chair works great. This forces the batter to work on getting on top of the ball.
Low pitch Tee – Set the tee to the lowest position. As kids get older, more pitches will be down there so they better learn how to hit it. A future post will show a video clip of this one which has a different twist to it!
Soft toss – Options for stations include normal bats and indoor balls, broom handles and tennis balls or golf Wiffle-balls, inside pitch, outside pitch, high pitch, and low pitch.
Stand in – Great option for a station if pitchers are throwing as well.
Wall 1 – Often called the fence drill where a hitter faces bat-distance away from a wall or fence and swings. Works on keeping the hands inside the ball so the bat doesn’t contact the wall. A padded gym wall helps in case the player does make contact with the wall.
Wall 2 – Batter stands as if the wall is where the pitcher is. His front foot is proper stride distance from the wall. He strides to the wall and completes a fundamentally sound slow motion swing until the bat gently taps the wall. This works on swing mechanics, proper stride length, and prevents lunging.
Soft-toss / Top hand – The batter places his back knee down on the ground and extends his front leg out towards the wall or catch net. Batter swings using only his top hand on the bat. Tiny Little League bats are good for this drill. Works on proper top hand performance on the swing.
Soft –toss / Bottom hand – Same as above but with the bottom hand.
Mirror swings – Slow motion or full speed swings where the batter can watch their own mechanics and make adjustments. Windows work very well also depending on the reflection.
Bunting - Stations may include bunting to first, bunting to third, suicide squeeze, base-hit bunts to first, and base-hit bunts to third.
There are many more so please add if there are some you use frequently!
There are many more so please add if there are some you use frequently!
Thursday, March 10, 2011
Indoor practice tips
With flood warnings in effect for my area over the next few days, it appears we will have to endure the wonderful "indoor workout" nightmare. If you live in one of the warmer, drier states, I hope you appreciate it. In Pennsylvania and certainly areas more north, we usually start the season in, shall we say, less than ideal conditions. A few years ago our very first day out on a field ended up being our first league game. The weather prevented us from getting even one day of practice on grass beforehand. Baseball is not alone. At our high schools, the spring sport season consists of softball, boys and girls lacrosse, boys and girls track, boys and/or girls volleyball, boys and/or girls tennis, and possibly other sports as well. When poor weather arrives, all have to fight for indoor gym time to practice. To make matters worse, many times you don’t know when or where your time slot and location will be until the last moment. It becomes a logistical nightmare at times.
It is what it is.
To keep your sanity and also get the most out of your indoor practice it becomes essential for coaches to plan and run an indoor practice on the assumption that you will not have a lot of time or a lot of space.
It is what it is.
To keep your sanity and also get the most out of your indoor practice it becomes essential for coaches to plan and run an indoor practice on the assumption that you will not have a lot of time or a lot of space.
 |
| Unfortunately, high school coaches and players usually become very intimate with spaces like this. |
Indoor Coaching Tips:
Plan ahead. Meet with your coaches early on and discuss options for any scenario. Come up with plans in advance for a 30 minute practice, 60 minute practice, 90 minute practice, etc. It’s also good to plan for hitting only, pitching only, infield only, outfield only, etc. practices which can help alleviate the amount of kids you have to deal with indoors on that day. Quickly pull out these plans as needed in a pinch.
Use stations. Standing around on the field is bad enough for players. A whole team standing around waiting for one kid to get out of the indoor batting cage is not only torture, it’s a waste of time and space. Break them up into small groups and rotate them around to a variety of drills.
Keep them moving. Boredom kicks in very quickly indoors. Limit each station to 5 minutes or less. It will force players to focus more on each drill since their time is limited. Go around the stations a few times if necessary but don’t keep them in one spot too long.
Use every possible space. Gyms, hallways, cafeterias, and classrooms are all fair game if managed correctly. If you use indoor appropriate equipment to prevent damage and return everything to where you found it, most administrators and teachers will be very accommodating. Don’t be afraid to ask. Or just do it and apologize afterward if needed!
Bring out the gadgets. Tennis balls, Incrediballs, mini-golf balls, superballs, fielding paddles, broom handles, and such are great indoors to break up the monotony of indoor work. Be creative and improvise to keep drills fresh, challenging, and interesting.
Avoid full length BP. If you are fortunate to have an indoor batting tunnel, divide it in two halves and have two stations going at the same time. More players are able to work simultaneously. Short-toss, soft-toss, and tee work are usually more productive options than one pitcher throwing and one player batting in a tunnel.
Bank it. Keep files on indoor drills for pitchers, catchers, hitters, base runners, outfielders, and infielders. Keep thinking and searching for new ones and add them to your bank of drills. Pull them out when needed.
Coaching is not easy. Failing to plan and organize practices just make things worse for everyone!
Tuesday, January 25, 2011
Off-season hitting - an overlooked drill
This time of year, hitters are gearing up for the upcoming season probably by focusing on their hitting mechanics and taking a ton of swings. One valuable drill that tends to be overlooked is standing-in on pitchers. "Standing-in" involves a hitter standing in the batters box and doing everything they normally would do during an at-bat except swing. One of the tough things about this time of year, especially if you are indoors, is getting your timing down as a hitter. Even if you are receiving live batting practice, you probably are not being thrown pitches from the full distance or from a pitcher throwing with full mechanics and full velocity. Pitching machines can simulate velocity, breaking pitches, and distance but they don't generally allow hitters to practice their rhythm or timing all that well. This is why early in the season pitchers usually have the advantage. They have been able to practice virtually everything during the off-season even though they may have done it indoors. The only adjustment they make is just taking everything outside once the season starts. Hitters, on the other hand, can swing hundreds of times a day using tees, soft-toss, short toss, and pitching machines but it is not nearly the same as facing live pitching outside in a game-like situation. Although hitters are not swinging the bat, standing in allows hitters to get a game-like view of pitches being thrown in order to work on their rhythm and timing. If done correctly, standing in can decrease the adjustment time once they get outside.
Here are 10 tips to get the most out of it:
Here are 10 tips to get the most out of it:
- Ask permission. Most pitchers have no problem with batters standing in because it helps them also. However, some may not want you to stand in until they have worked on what they need to work on especially if it's a mechanical thing. Having a batter stand-in is a bit of an added distraction for pitchers so don't stand-in until they are ready.
- Wear a helmet. Obviously.
- Play games in your head. I indicated in many posts how important the mental side of a player usually has a big factor in making a player go from good to great. This drill is no different. Mentally, a player thinks he is in a real game. The crowd, runners on base, big game pressure, etc. are all a reality in the player's mind even though he may be in a gym somewhere. Pretend you are in different situations. Runner on second, no outs and look for a pitch to move the runner over. Runner on third, infield in, less than two outs. Look for a pitch up in the zone to drive to the outfield. Two strikes, have to put the ball in play. Never just go through the motions. You are practicing the mental side of your game as well.
- Know what's coming. Early on when you are standing-in, know what the pitcher is going to throw. You get a chance to see that pitch from start to finish without the need to hit it. You can take that info and use it against other pitchers.
- Don't know what's coming. Obviously, this is what you are going to do in a game so it's to your benefit to practice this way for at least some of the pitches. Ask the catcher to give signs instead of having the pitcher announce what pitch he is throwing. Like a game, focus on the release point and try to pick up spins, etc. to identify the pitch. Tell the pitcher if he is tipping off his pitches too soon. He needs that feedback too.
- Zoom in. When the pitcher is standing on the mound, look at the entire pitcher equally. As the pitcher starts his motion, narrow your vision/focus (zoom in) to eventually see only the ball and hand at his release point. Practice this visual drill because it's essential come game time.
- Focus on rhythm and timing. This is the big reason for standing-in. It enables the hitter to focus on the timing of their load, the stride, and the firing of the hips, hands, and bat. The batter works on the rhythm and timing of all this but just doesn't swing.
- "Use all fields". Make sure your mechanics, rhythm, and timing are not just geared towards pulling the ball. Doing #3 correctly helps with this.
- Track the ball to the glove. Pete Rose used to follow the ball all the way back to the catcher's glove when he took pitches. Check out the second pitch he sees in this clip of his record breaking at-bat. This is a good habit because it allows you to see how the ball moves during the last 10-15 feet of the pitch. Many times a pitch will look like a strike coming in but will move quite a bit in the last 5-10 feet and end up being a ball. This information is missed if the batter keeps his eyes directed in front of home plate when he takes the pitch.
- Get some variety. Stand in on multiple pitchers. Righties, lefties, 3/4 arm angles, over the top throwers, etc. Stand in on them all. You're going to see all types during the season.
Monday, January 24, 2011
Spring training - Focusing on the "little things."
I came across this article the other day in one of my files. I gave it out to my players a couple years ago. The article is dated March, 2006 but it certainly has relavence today for any player or coach preparing for the upcoming season. It also goes a long way to explain the Twins' success over the years in a smaller market with a much lower payroll than most other winners.
Click on the title.
Twins retool their fundamentals
Twins retool their fundamentals
Saturday, January 22, 2011
Tips for Long-tossing and/or "Long-throwing"
Disclaimer
There is an on-going debate in baseball circles about the value of long-tossing.
I know it's shocking to think that anything in baseball is debated.
(Yes, that's sarcasm if you weren't sure.)
Some love it, some hate it. This post does not get into that argument.
I'm in the "love long-tossing" camp and it's ok if you are not.
I saw a great MLB Network Diamond Demo on long-tossing (2nd half of clip) or what Mitch Williams calls "long-throwing." I like and agree with his explanation on the difference in terminology. In the Demo, Mitch mentions "walking into the throw." I have always prefered the method used by Roy Halladay in the following YouTube clip. He takes a step forward with his left foot but then hops behind with his right foot, steps, and throws. I like this better because it keeps the pitcher's front side closed longer. A good habit for a pitcher!
The next clip shows a long-tossing routine which includes what they call the "stretching out" phase and the "pulling down" phase. Some people see value in launching a high arching ball to stretch out and strengthen the arm but, like Mitch Williams, I don't like the idea of lifting the front side too much and leaning back to do it. That's not what pitchers do in a game so I'm reluctant to have pitchers do it in practice. I believe there is more value in throwing balls that are able to get to your partner on a hard line drive rather than a high arching one that travels 300+ feet. For most players, that might require maxing out at around 150-200 feet depending on your arm strength. I guess that means I like their "pulling down" phase better.
Over time, pitchers usually develop a long-tossing/long-throwing routine that works best for them.
Wednesday, January 12, 2011
Indoor drills for outfielders
Of all the positions on the field, the outfield positions tend to get shafted the most with regards to indoor practice. I'm based outside of Philadelphia so we routinely have to spend many practice days indoors because of rain or snow. Farther up north is certainly worse so don't feel the need to shed tears for me.
If it is not possible for outfielders to find a clear, dry area to practice on (other field, parking lot, etc), try these indoor drills that work basic outfield skills. As always, if you have other drills, pass them along!
Pass drill: Each outfielder gets a ball and stands in line. One at a time, an outfielder jogs towards a coach and flips the ball to him. The player runs around the coach and goes out for a pass. The coach throws a pass with the ball and the outfielder runs it down. The next player than goes and the drill continues. This works on running technique, glove technique, catching on the run, keeping your head still when running, eye-hand coordination, and timing. After each player has gone twice, have players approach the coach from the other side so the player is running and looking over the other shoulder this time.
Corner drill: This drill replicates a ball hit to an outfielder's left or right. Players line up on one side of the gym (to the left or right corner of a base-line on a basketball court for example). A coach rolls a ball towards the other corner of the gym. The outfielder cuts the ball off (running down the base-line towards the opposite corner) before it hits the wall, turns, and throws to a middle infielder who acts as a cut-off man at the other end of the gym. This works proper angles, footwork before and after catching the ball, and hitting the cut-off man.
Wall drill: An outfielder stands in the center of the gym and sets up as if a pitch is being thrown. The coach tosses a ball over the outfielders head so the ball rolls to the wall. The outfielder turns and chases the ball, fields it off the wall and throws it to a cut-off man at the other end of the gym. This works the footwork going back on the ball, reading balls off the wall, getting to the proper side of the ball before catching (right side if right-handed, left side if left-handed), and throwing accuracy to the cut-off man.
Zig-Zag drill: Outfielders line up next to and to the left of a coach at one end of the gym. A player runs straight ahead and looks over his right shoulder for the throw. When the coach yells "now" the player whips his head around to his left shoulder as the coach tosses the ball over that shoulder. The outfielder tracks it down and catches the ball. This drill mimics a ball hit over the outfielders head that curves or is wind-blown to the other side of the outfielder. Players should quickly whip their chin/eyes around to the other shoulder (yes, they will lose sight of the ball for a split second) so that they continue running with the same forward mechanics. After a few turns apiece, have players line up on the other side of the coach to practice the other side as well.
Come-up throwing drill: Players line up on one side of the gym facing the other side. A coach starts the process by throwing a ball at the far wall. The first player in line charges the ball that is now bouncing towards him, gloves it, and throws it to the far wall. The ball bounces off the wall and the next outfielder then charges and does the same. The round-robin drill can continue as long as the coach wishes. This drill works on charging balls, footwork before and after catching, being aggressive through the ball, proper arm angle (over-the-top) when throwing, and accuarcy.
First-step drill: Place four cones on the four corners of the basketball court. One outfielder stands in the middle of the court - the others off to the side. The player sets up as if a pitch is being thrown and a coach points to a cone. The player reacts as if a ball is hit towards the cone. A coach could even toss a ball towards a particular cone for the player to try to catch. This works on first step quickness to the ball, proper angles, and aggressiveness.
Note: All the drills mentioned above certainly work outside as well. Modify them for your needs and the ability level of the players you work with. Create some new ones of your own!
If it is not possible for outfielders to find a clear, dry area to practice on (other field, parking lot, etc), try these indoor drills that work basic outfield skills. As always, if you have other drills, pass them along!
Pass drill: Each outfielder gets a ball and stands in line. One at a time, an outfielder jogs towards a coach and flips the ball to him. The player runs around the coach and goes out for a pass. The coach throws a pass with the ball and the outfielder runs it down. The next player than goes and the drill continues. This works on running technique, glove technique, catching on the run, keeping your head still when running, eye-hand coordination, and timing. After each player has gone twice, have players approach the coach from the other side so the player is running and looking over the other shoulder this time.
Corner drill: This drill replicates a ball hit to an outfielder's left or right. Players line up on one side of the gym (to the left or right corner of a base-line on a basketball court for example). A coach rolls a ball towards the other corner of the gym. The outfielder cuts the ball off (running down the base-line towards the opposite corner) before it hits the wall, turns, and throws to a middle infielder who acts as a cut-off man at the other end of the gym. This works proper angles, footwork before and after catching the ball, and hitting the cut-off man.
Zig-Zag drill: Outfielders line up next to and to the left of a coach at one end of the gym. A player runs straight ahead and looks over his right shoulder for the throw. When the coach yells "now" the player whips his head around to his left shoulder as the coach tosses the ball over that shoulder. The outfielder tracks it down and catches the ball. This drill mimics a ball hit over the outfielders head that curves or is wind-blown to the other side of the outfielder. Players should quickly whip their chin/eyes around to the other shoulder (yes, they will lose sight of the ball for a split second) so that they continue running with the same forward mechanics. After a few turns apiece, have players line up on the other side of the coach to practice the other side as well.
Come-up throwing drill: Players line up on one side of the gym facing the other side. A coach starts the process by throwing a ball at the far wall. The first player in line charges the ball that is now bouncing towards him, gloves it, and throws it to the far wall. The ball bounces off the wall and the next outfielder then charges and does the same. The round-robin drill can continue as long as the coach wishes. This drill works on charging balls, footwork before and after catching, being aggressive through the ball, proper arm angle (over-the-top) when throwing, and accuarcy.
First-step drill: Place four cones on the four corners of the basketball court. One outfielder stands in the middle of the court - the others off to the side. The player sets up as if a pitch is being thrown and a coach points to a cone. The player reacts as if a ball is hit towards the cone. A coach could even toss a ball towards a particular cone for the player to try to catch. This works on first step quickness to the ball, proper angles, and aggressiveness.
Note: All the drills mentioned above certainly work outside as well. Modify them for your needs and the ability level of the players you work with. Create some new ones of your own!
Wednesday, January 5, 2011
Off-season pitching tips
After the holidays is when many pitchers start to throw off the mound and work on pitches. Here are 10 tips to get the most out of an off-season pitching program:
- Build velocity slowly. Many high school (and above) pitchers have been spending time lifting and possibly long-tossing since games ended in the Summer or Fall. Some haven't touched a ball in a while if they play other sports. Either way, pitchers have to be careful not to overdo it too soon. Competitive juices sometimes have to be regulated in order to prevent injury. Jumping back on the mound and airing it out is a great way to get hurt. Pitchers have to resist that temptation and slowly build back their arm strength. Note: If you are still lifting, be sure to lift after you throw and never right before throwing.
- Throw away from the mound, pitch on the mound. As I explained in this previous post, throwing is different from pitching. If you are playing catch to get loose with a catcher who is standing up, get off the mound. If you are working on mechanics and pitching, get on the mound and have the catcher squat down. That's what you would do in a game so practice that way. Pitching to a standing catcher teaches you to throw up in the strike zone.
- One pitch at a time. Master command with the fastball before practicing another pitch. When you can throw 60% strikes with a fastball, then start on a change-up. When you get to 60% with both, then add a another pitch, and so on. Having eight different pitches is worthless if you can't get one over the plate consistently.
- Throw to the center. Early on, aim for the center of the plate. Stay away from the corners. Aim for the center until you get your command back. You will probably notice that when you do this many of your pitches will move to the corners based on your inaccuarcy and natural movement. There is a tremendous lesson for young pitchers here - Aim for the center of the plate and let your natural movement take it to the corners.
- Give equal time to the stretch. A pitcher's ability to pitch longer into games depends on how he pitches when runners get on base. It is essential that pitchers spend a great deal of time practicing all their pitches from the stretch position.
- Shoot for the knees. After getting the basic command down pat, focus on only throwing at the knees. When practicing, any pitch that ends up above the knees should be viewed as a bad pitch. Be a perfectionist when pitching down in the zone. The only exception is when you purposely practice throwing up in the zone.
- Be smooth and balanced. Think of pitching as a graceful activity instead of a power activity. Work on a well timed, mechanically sound, balanced, and smooth delivery. A "free-and-easy" motion is what coaches and scouts like to see.
- Schedule time to play around. Playing around and goofing off are not the same thing. "Goofing off" means wasting time. "Playing around" means scheduling time to tinker with different pitch grips on all your pitches. This is what many major league pitchers do while playing catch. Who knows, you might just stumble across a good sinker or a nasty new out-pitch.
- Chart your sessions. This has a lot of value but is rarely done. When beginning to throw in a regular routine using numerous pitches, have someone chart your balls and strikes to see how you are progressing. It also forces pitchers to focus on what they are doing more often since they are being scored.
- Get out your running shoes. An off-season running program certainly does not end when you start throwing again. It actually becomes more important to get into the habit of running after you throw in order to clean out the swelling and lactic acid that builds up after throwing.
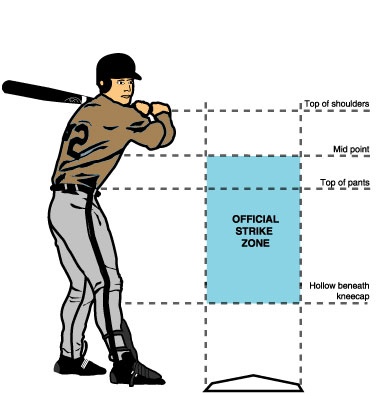 |
| Throw to the center of the plate, knee high. Anything higher is easier to hit. |
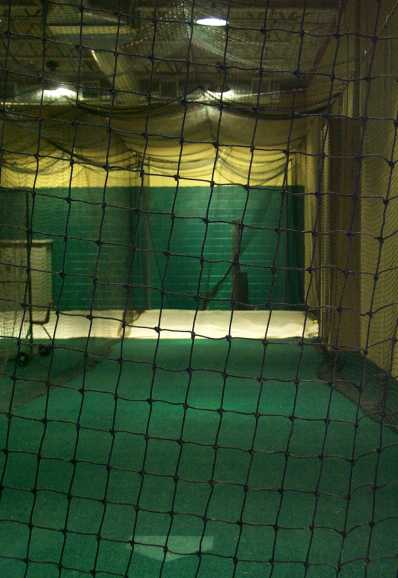 |
| How you manage your time in here over the winter months could make the difference between good and great. |
Monday, January 3, 2011
All you need is a ball and a wall
 |
| My elementary school playground. There is no telling how many hours I spent there practicing by myself. |
Advantages:
 |
| A great indoor option if you have access. Do not hurt the wall or the floor with the balls! |
- You can practice by yourself
- Every position on the field can be practiced - just use your imagination
- Develops arm strength
- Not much space is needed
- Develops pitching accuracy
- If there are lights (mine did), you can throw day or night
- Can practice year round. A few times I brought a snow shovel!
 |
| Perfect! Even has a strike zone. |
Tips to using a wall:
- Throw at varying distances - short toss to long toss if space permits
- A rubber pitching machine style ball works best. Leather balls get torn up.
- Use different sizes and types of balls to develop soft hands, quick reactions, and eye-hand coordination. Tennis balls, racquet balls, super balls, Super Pinkies, and golf balls are all fair game and work great against a wall.
- Use your glove and just your bare hands at times too.
- Use a training glove or pick up a paddle at the dollar store to develop proper two-hand fielding.
- If you are able to use an indoor gym wall, be sure to use balls that do not mark up the wall or the floor.
So if you are looking for something to do that is productive, challenging, fun, and FREE ... go find a wall!
Subscribe to:
Posts (Atom)